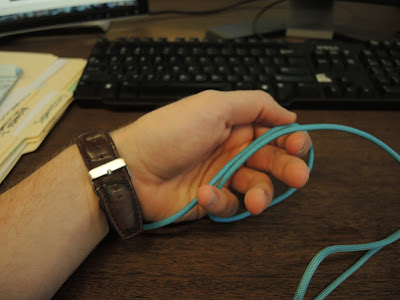
Hello Paracorders!
Well, I did it! As I mentioned last week...and the week before, I was aiming to finish a paracord can coozie. I wanted to finish it for the blog post last week but sadly missed my deadline. However, I continued to work through my frustration and uncertainties and this week I finished it!
It's by no means perfect or even close to it. But it is, in fact, a completed can coozie. It will hold my beverage (whatever that may be) and keep it refreshingly cool :)
If you want to make your own can coozie, set aside a lot of hours and mentally prepare to stay calm. No matter how angry or confused you get, just remember that it will undoubtedly turn out awesome and you will be sooooo proud you finished it! Also, it uses a lot of cord (about 25 feet of each color):
Here is my journey:
I started my coozie base off Instructables.com's directions. I got through the top loop with the clasp (the black strand) and then I just started weaving and didn't stop:
I had finished the entire first row before I went back and looked at the instructions...where I realized I made about 10 too many loops. Oops. With 25 feet of cord, it takes a little longer than usual to make a loop. So at this point I went back and took out a few loops before I got sick of that and stopped.
I tried to follow the instructions after that, but things weren't lining up so I did my own thing.
I think it's safe to say if I would have followed the instructions the
entire way it would look much much better. But, it serves it's purpose
and I'm happy with it!
Now, I just kept at my weave and looped and looped and looped. Keep in mind, I had to do other parts of my job (such as doing awesome Facebook giveaways for you all) during the course of making this coozie which is why it took me a little longer.
If you don't have a fid, you will want one for this.
Shameless plug: http://ow.ly/SXaAS
Seriously, I would have ruined my loops and had to re-tighten every loop if I hadn't had a fid. Although, you will certainly be able to complete this without one!
This was a very exciting and frustrating point. It was starting to take shape and my worries about not entirely following the directions were diminishing.
The frustrating parts were:
1) I had 20+ feet of paracord I had to pull through every single loop that constantly got caught on the 2nd strand or my chair or my knee
2) It kept sliding down the can so I had to re-position it a lot.
Luckily, just a couple rows later the sliding stopped considerably and it was much nicer.
If you could see my face in the picture you would be a big smile.
The handle part was over! I was basically on Cloud 9 at this point.
The home stretch.
I went back to the instructions to figure out how to do the bottom. I followed it, but it looked a little different since I also didn't think to check before I got to the last row to see if anything was different. It was.
So I don't even want to show you the bottom, because it is NOT pretty. But since I like you guys, I will.
Don't laugh.
Remember, I'm also new at this so I think I should be given a little leeway :)
In case you're wondering, refer back to instructables.com for how to do the bottom. The last, and oh so satisfying part, is to take the two strands and pull them through the coozie, snip as close as you can get to the base (which is close because the bottom part will pull up) and burn the ends with a lighter.
HERE IT IS!!!!
I persevered and finished my coozie. I will enjoy it for the rest of my life!
This was the most delicious tasting pop ever.
Paracord love,
Lauri
As always, you can find us on Facebook, Twitter, Instagram, Google+, and Pinterest.
#HappyCording
This blog began the 7th of January 2014 and is dedicated to Paracord and fun (I think the two go hand in hand). I love to blog about Paracord whether it is a special product that is changing the game, a new technique or simply how Paracord can improve your life. I am all about all things Paracord. If you are interested in a fun, engaging and lighthearted blog and Paracord is a passion of yours like it is mine, come check it out!
Friday, October 2, 2015
Friday, September 25, 2015
Coozie
I set out today to create a paracord can coozie and write to you about it.
However, I didn't anticipate that it would take me hours! So this post is short and sweet.
This coozie will take me a couple days to complete and I think in the end it will be worth it. As I said last week, never quit a project (especially a Paracord project)!
Here is my project so far (Please ignore my chipped nail polish):
What projects have you worked on that look much longer than expected? Were you happy with your end result? Comment below!
Happy Cording!
Paracord Love,
Lauri
Friday, September 18, 2015
Never Quit a Project (especially a Paracord Project)
Happy Friday to all my Paracorders,
Never quit a project.
You may have a difficult time doing it, someone may do it better, but practice makes perfect. Don't give up on something because you don't get it right away. All good things, hobbies, relationships, take time and patience. Everything has another way of being done which may end up being the way that works best for you. Find it! You will get better.
Yesterday was quite a day. As I said last week, I wanted to make the Square Braid Bracelet. I used the video from our website. This weave didn't look terribly hard, but as I very quickly found out...it is. I thought this bracelet looked fun to make (very un-"square") and I had yet to make a bracelet where I took the guts out (which I was very much looking forward to doing).
So I gathered my two different colored paracords, lighter, fid, buckle, and scissors. I put my headphones in and set to make my bracelet.
Or so I thought.
I instantly got stuck on the first knot. After about 10 minutes and 20 tries (remember, I'm still a newbie with big dreams) I finally had the first knot done and was very proud of myself. After I got 2 more "braids" done I knew it wasn't looking right and took them out. I did another 20 minutes of who knows how many attempts and was unsuccessful. I couldn't follow the video very well. Everybody learns different, and videos are definitely NOT the way I learn best. I tried without looking at the video, I tried finding other videos online, which surprisingly, I was also unsuccessful at.
I decided to put it down for 5 minutes go give my mind and fingers a rest. Hoping that would be all it takes to get this braid to "click" in my head. Back at it, tried for another 10 minutes still unsuccessfully. I took the headphones off my head - forcefully - and declared out loud that I quit. I then had to clarify I wasn't quitting Paracord Planet, I was just quitting the bracelet :)
At that point my manager turned around to see what I was doing. He worked at it for about 60 seconds before he figured out the braid. Finally, I had someone in front of me showing me how to do this "impossible" braid. He made it look so much easier and did it a tad different than the video which helped me immensely!
Finally, I went back to my desk, put on my music and finished the braid with very little issue. And fun was had by all.
Back to my original point. Never quit a project (especially a paracord project since they're awesome) because you don't get it right away. Ask for help. Find a different way of looking at it. There are infinite resources out there of finding an answer. Find it. Work at it. Be proud of it.
For those of you interested in the easier way (for me) to do this braid, this is it. The video I watched had loops on top of loops and I couldn't figure out which to have on top and which end to put through which loop and on top or under which loop side. What I found easiest was to (after your first square braid on the buckle is done) simply lay each strand on top of the first one in a clockwise or counterclockwise (it doesn't matter which) manner. That way, you only have to do one loop and its very easy to see which strand to put the 4th strand under. then pull tight. Note: your fingers will be a little sore after this one, but I promise it's worth it!
For those of you interested in my finished bracelet here it is:
If I had given up and not tried it the new way, I wouldn't have this awesome bracelet that I'm really proud of (and subsequently showed everyone in the office). Practice makes perfect.
What projects have you guys made that were hard for you but you trudged through and are proud of your final result? Share with us in the comment section.
As always, please feel free to contact me on any of our social media avenues- Facebook, Twitter, Pinterest, Instagram, and Google+.
Paracord Love,
Lauri
Friday, September 11, 2015
Sawtooth
Hello Paracorders,
I'm now 2 weeks in my time here at Paracord Planet and my paracord skills are definitely improving! I've decided every week I'm going to make a new creation, work my way up to intricate creations, and eventually make new videos myself. This week I made the Sawtooth/Shark Jawbone bracelet.
Let me tell you..It was not as easy as I thought it would be! I got tripped up on the first loop for a couple tries, but once I got past that it was smooth sailing. Once I got into a good rhythm I just turned on my 90s Pandora and weaved. Isn't that the best part? Where you get into a good system and can zone everything and everybody out and just work your paracord magic. I wish I could show you all a picture, but as I'm typing this I realize I brought it home to show my husband and left it there.
The finished product was good, and my best bracelet yet, but still not great work. That is yet to come! I think the next bracelet I want to try is the Square Braid bracelet. Do you guys have any suggestions for a beginner paracorder?
Try the Sawtooth yourself and show us your finished product: http://ow.ly/S6qEW
As always, please contact me with any questions or comments! We're on Facebook, Twitter, Instagram, Google+, and Pinterest..
Paracord Love,
Lauri
Friday, September 4, 2015
What Do You Want to See?
Hello paracord crafters!
Well, it's the conclusion of my first week here at ParacordPlanet and it's been crazy! I've met a lot of really cool people, learned about the world of pararcord, and attempted my very first paracord bracelet (Thin Blue Line). Let me tell you, it didn't go very well, but practice makes perfect!
From day 1, I could tell the paracord world was close-knit. Everyone loves sharing their work, giving tips, and interacts with each other. I love it! So, as I'm new to your world, what are some tips and tricks you can give me? What bracelet should I attempt next? Also, I want to help you guys perfect your craft too, so is there any thing you want to see from us and aren't? I love hearing from you so please chat with us on here, Facebook, Twitter, Instagram, or Pinterest!
Your newest paracord fan, Lauri
Wednesday, July 22, 2015
Hello Paracord World!
Hello Paracord Lovers!
My first two weeks at Paracord Planet have been a real eye opener into the
paracord world! I had no idea there
would be so many options when it comes to paracord. From size to color, even
the accessories and buckles you can choose from; it’s truly something else. I
want to say thank you for welcoming me into the Paracord Planet family with
open arms.
My first two attempts at a paracord bracelet went great! (check out my work below!) Once I found my
rhythm I found it to be very therapeutic. My third, fourth, and fifth attempt didn’t
go as planned... frustration set in and back in my drawer the paracord went. My
patience will be tested with paracord, but it'll be worth it. As I start my
journey with paracord I ask you to come with me. Soon I will start making
tutorials and sharing them all with you! Make sure you're following us on
Facebook, Twitter, Instagram, Google+, and Pinterest as I will be posting them
there as well as on our website. There will also be new contests rolled out and
even more ways to win paracord! I'm excited to interact with you all and learn
more about paracord then I ever imagined!
If there is something you want to see more of, like, or don't like, share
it with me!
Maggie
#HappyCording
What do you think of my paracord creations?! As you can see my go to paracord color is pink!
Tuesday, July 7, 2015
Putting a Wrap on my Time at Paracord Planet
Written By: Jackson Yakowicz
Jackson passes on the Paracord Baton (aka Paracord Pete) to Maggie
I was twenty years old when I started working at Paracord
Planet. I had never heard of paracord before—I merely was looking for a job
that could pay some bills and grant me a few college credits. It took me about
three months to learn my first weave; it took me roughly six to learn the
jargon. Although I was far from expert status, it only took me a few days on
the job to realize what an amazing sense of community existed amongst you
paracord crafters. I was welcomed in to it, I provided content to it, and I
will miss it dearly. Over the past year and a half, I learned more about
hitches, knots, and weaves than I ever thought possible. Although I will be leaving
a drawer full of paracord crafts behind, I will be bringing with me an immense
collection of memories from my time spent at Paracord Planet.
Alright, enough with the sentimentality. I am so very proud
to give over the reins to Paracord Planet’s social media accounts to my friend,
Maggie. As I look back on all of the relationships that I have made with you people
over the past 16 months, I can’t help but feel ecstatic for Maggie to share
some of those same experiences. She has an innate ability to connect with people,
a marked way with words, and a budding fascination with paracord. I’m leaving
you all in very good hands!
For the last time, #HappyCording.
Wednesday, June 24, 2015
The Ultimate Paracord DIY
How to make your own fids, jigs, and spools
Paracording
can be an expensive habit. Aside from the cost of paracord itself, there are
additional expenses for fids, jigs, spools, books, and even more accessories
that will elevate your crafting to the next level. When I first started
crafting with paracord, I didn’t think I needed any additional accessories;
only paracord and buckles. Once I started working with more complex designs, I
realized how wrong I was! Jigs, Fids, and more soon became less of a benefit
and more of a necessity. Although we offer all of these paracord tools for sale
on our website, I also wanted to make you aware of some DIY projects for making
your own paracord tools. For the big do-it-yourselfers, these projects will
help save a few pennies, and will prove to be fun projects for you to undertake.
Check them out:
Do-It-Yourself Paracord Fid
Fids are an essential paracord crafting tool as they allow you to navigate your cord through tight loops, and also help you when you go to tie off your ends at the end of your weave. Most recently, I have found fids to be an asset when it comes to getting paracord through the small hole in a 3/8" buckle. Ultimately, the fid is an asset when it comes to expanding your craft. To see how to make your own DIY Fid, click here.
(via Instructables)
Do-it-Yourself Paracord Jig
If you've been eye-balling your paracord projects for sizes: the jig is up. (Sorry, I had to). The Paracord Jig comes in handy when it comes to sizing and weaving your projects (especially bracelets, belts, and collars). Whether you need a jig that is longer than the standard one sold in stores, or you just want to save a few bucks, you'll love this project. To see how to make your own DIY Jig, click here.
(via Instructables)
Do-it-Yourself Paracord Spool
Now, the easy project. Although a spool might seem unnecessary at first, once you start collecting your paracord in bulk quantities, you'll be begging for one. The paracord spool not only helps you keep track of your cord in all of its untangled glory, but it also makes for an easy way for you to dispense the amounts of cord that you need for a given project. To see how to make your own DIY Spool, click here.
(via Instructables)
Do you have any DIY paracord tool projects that we didn't touch on in this blog? Tell us all about it on our Facebook, Twitter, Google+, Pinterest, or Instagram page. We would love to hear from you about what creative projects you have been working on! Until next week... #HappyCording
Written by: Jackson Yakowicz
Contact at jacksony@imsetc.com
Wednesday, June 17, 2015
The Easiest Paracord Bracelet Ever
A tutorial and design for the adjustable paracord bracelet
Before you can swim with the Shark Jawbones, and even before you can tread with the Fishtails, you need to be able to master a simple design. An easy paracord design is a great way for beginners to master a few simple knots, become familiar with the crafting qualities of parachute cord, and build their confidence so they can go on to try out more difficult designs. This is one of the first designs that was introduced to me (special shout-out to Chris Jensen for this one). What I love about this design is not only its ease, but how great it looks and its adjustable quality which allows me to easily take the bracelet off before I step in the shower or go to sleep. The adjustable quality also allows for one-size-fits-all, so if you feel so inspired, you can start a little group called "The Sisterhood/Brotherhood of the Traveling Paracord Bracelet." Alright, I've gotten ahead of myself. Let's just introduce you to the simple design.
Step 1: Collecting your Materials
For this design, you're going to want somewhere between 1-2 ft. of paracord (depending on the size of your wrist, and how much cord you're willing to cut off at the end), a pair of scissors, and a lighter (optional, but recommended for aesthetic reasons once the bracelet is complete).
Step 2: Creating your Structure
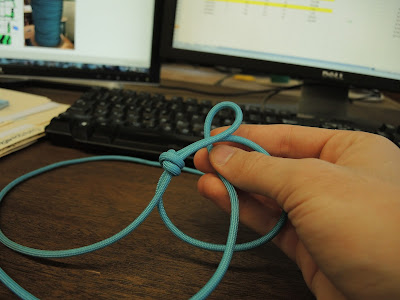
To begin crafting your bracelet, you want to get down your structure. Simply make a loop around your pinky and index finger with the cord as demonstrated below.
Step 3: Making your First Inside Loop
In order to make your first inside loop, you have to take the strand on the right side of your structure and loop it around the back of the bracelet and through the middle hole. Keep this loop in place! You will be running cord through this later. See below.
Step 4: Making your Second Inside Loop
Take the strand of cord that you just pulled through the inside hole and make a loop around the back of the bracelet again. Pull it back through the middle hole, and keep the second loop in place, too. Next, you will be pulling the strand of cord through both these loops.
Step 5: Pull Right Strand Through the Two Loops
Run the right strand of cord (previously pulled through the middle hole in the bracelet) through the two loops at the top of your bracelet. Pull tightly.
Step 6: Flip the Bracelet and Repeat First Loop
I suppose it's not necessary to do so, but I prefer to flip the bracelet so that I'm making the next set of loops on my right side, too. Make your first loop of this set again.
Step 7: Make your Second Loop
By now, you probably know the drill. Take the strand of cord that you ran through the center of the bracelet and make another loop around the backside. Remember, keep enough room in your loops to run a strand of paracord back through.
Step 8: Pull Strand Through the Two Loops
Take the strand that's currently sitting through the center of the bracelet and run it back through the two loops (from left to right) and pull tightly.
Step 9: Cut your Ends
Now comes the time for the finishing touches. Begin by snipping the ends off both sides of the paracord bracelet. Maybe you'll have enough excess cord left to make another bracelet! In the meantime, feel free to cut as close as you want to the knot. Those knots will (k)not come loose ;)
Step 10: Light and Fuse the Ends
If you don't have a lighter, this step is not entirely necessary. Lighting the ends near the knots and fusing them to the knot just makes the bracelet look better. Nobody wants to look at frayed ends, right?
Step 11: Enjoy your Design!
Congrats! You are all done. Adjust the bracelet by pulling on the knots. You can make it bigger by moving the two knots closer together, and make it smaller by moving the two knots away from each other. Put the bracelet on your wrist and enjoy.
I wear these two bracelets every day. I think that you will love this design, as well. Show us your completed project on Facebook, Twitter, Google+, Pinterest, or Instagram.
Written by: Jackson Yakowicz
Contact at jacksony@imsetc.com
Wednesday, June 10, 2015
Fishing for an Answer
Pictorial or Video? Which to use for the Double Fishtail Weave?
For those of you who have been keeping up with our social media, we have started creating and posting both videos and pictorials for various weaves every week. Our most recent design was for the "Double Fishtail Weave," which we uploaded to our YouTube page last Friday and posted a pictorial for on our social media pages yesterday (you can find both the video and the pictorial below). As I have merely been the content poster for these designs, and not actually the man behind the weaves, I figured I ought to put my skills to the test by trying out the Double Fishtail by watching both the video and the pictorial. Every visual learner has their own preference between video and image, so I wanted to see which worked best for me and put silence to the debate: which is better?
Pros and Cons of the Pictorial
Pros:
- The pictorial allows you to dictate the pace of your weaving, without having to readjust the video to catch up.
- The pictorial, in my opinion, is more aesthetically pleasing to look at. Each step is laid out plainly and cleanly.
- You are able to see the finished project at the same time that you see the early steps. This helps you keep a fresh idea of what your design should be looking like.
Cons:
- You are not able to hear vocal instructions. Sometimes just looking at a picture doesn't help, and you need that voice in your ear to talk you through it.
- Pictorials often make the weave look a lot easier than it actually is. It doesn't show the aches and pains that a video might.
- The first and last step are harder to see. Which side should you go through the buckle? How do you get the cord through the backside of the bracelet when your weave is finished? For experienced crafters, this isn't a huge issue, but if you are new (and have no idea what a "fid" is) then you may run into some difficulties.
Pros and Cons of the Video
Pros:
- You are given much more thorough instruction, both through vocal commands and behind-the-scenes footage of how you set up the base of the bracelet, how you use the fid, etc.
- It seems much more personal. With a pictorial, you are not given any words of encouragement or helpful pointers. With a video, those are available (and, quite needed on difficult weaves).
- You are able to follow along with your "teacher." I say "teacher" for lack of better word, but when you are learning a new design, the person that is instructing you is exactly that--a teacher. You may have to hit pause a few times, but you are able to make your bracelet in sync with the person on the video.
Cons:
- I hate clicking pause. I hate rewinding video. I hate feeling like I am going too slowly! With a tricky weave, it is sometimes unfortunate to see how easy your teacher makes it look.
- If the teacher ever moves their hand out of focus, you don't get as sharp of an image as you would with a pictorial. This can complicate matters, or just become more of a nuisance to look at.
- You are not able to see the finished product simultaneously. Sometimes it feels like you are just aimlessly weaving, and this can make you worry that your project won't look as great. You will eventually get there, but it can trip you up mentally at times.
You will have to decide for yourself which works best for you! I found that the video was the best to use for starting and finishing the weave (getting the cord on the bracelet, and using the fid to finish off the pattern), but the pictorial was most useful for the middle steps. To be honest, this design was a little bit more difficult than expected. Because the original Fishtail Weave is so quick-and-easy, I expected this one to be the same. However, I found that it was a lot tougher to keep the weave tight and symmetrical, and I also thought that getting both pieces of cord on a single buckle was pretty time-consuming. I would suggest using a larger buckle and/or thinner cord (275, 325, 425, etc.) for this design. It's worth a shot! I'll be interested to hear what works better for you: the pictorial or the video.
Tell us about it on Facebook, Twitter, Google+, Pinterest, or Instagram. If you have any future ideas for a blog, let us know! #HappyCording
Written by: Jackson Yakowicz
Contact at jacksony@imsetc.com
To read Jack's full blog, visit here.
Wednesday, June 3, 2015
Five Lessons I Learned From Paracord Crafting
When
I first started at Paracord Planet, I had never touched paracord before.
Actually, I had never heard of
paracord before, much less had the opportunity to try to make a bracelet. There
was a definite learning curve from the time of my first (attempted) Fishtail
Weave to where I am now: an adequate paracord crafter with a handful of monkey
fists, dragon’s tongues, and lightning bolts in his arsenal. My successes—and more
importantly, my failures—have helped me compile this list of five lessons
learned from paracord crafting. Enjoy.
Lesson #1: Patience is a
virtue.
This
lesson comes in to play many times during one’s experience with paracord. For
one, you must have the patience to realize that your first designs are going to
take you a while to master. The Cobra Knot Weave was the only design that I mastered
on my first try. Everything else had its difficulties. It’s important to
remember that you are not alone in this regard. Nobody picks up twenty feet of
paracord and crafts a Modified Sanctified Weave on their very first trip to the
paracording room. Rome wasn’t built in a day!
I
found that the best way to tackle a weave was when nobody else was watching.
Follow a YouTube tutorial, or a pictorial, and familiarize yourself with each
step. Then, go through the process slowly and allow yourself enough time to
complete it. Repeat. Repeat. Repeat. Practice truly makes perfect, and good
things take time. Treat learning new weaves in the same way that you would
treat a research paper for school. It is not expected to make sense right away.
If you’re patient, and give the weave the right amount of time to learn, you
will get it. Trust me.
Lesson #2: Readjust as you
go.
Once
you get in the swing of things, it will start moving quickly. It is easy to get
lost in this fast pace and keep going with your weave without looking back at
what you’ve done. I think this is a fitting allegory for life too: if you’re too
focused on what you’re doing right now, and fail to look back at what you’ve
made, the end result won’t be pretty.
Take
the time to pull the base ropes, push your weaving ropes in, and make sure
everything is tight and aesthetically pleasing. You should see my first
Corkscrew. I spent the entirety of my time focusing on the weave that I was
currently on, that I never took any time to readjust. The result was evident.
Keep it tight.
Lesson #3: Add some
(matching) color.
Paracord
crafting is truly an art. The evolution of paracord somewhat mirrors the
evolution of film. We began by only using simple colors, such as black, white,
and olive drab, just like film was only produced in black-and-white. Now,
however, there is an abundance of colors to choose from. What will separate
your bracelets, lanyards, and keychains from other crafters’ projects will be
your color choice.
Make
sure you are choosing the right colors for the job. Not every color goes great
together. For example, our Pink Lemonade cord (pink and yellow), probably
wouldn’t work too well with our Lightning Cord (black and blue). Make sure that
color choices make sense and bear in mind that you are making a piece of art.
Art is supposed to be pleasant to look at. I would suggest Pairing complementary
solid colors together (greens with reds, blues with oranges, purples with
yellows, etc.), or using one solid color with a multi-color that incorporates
said solid color (Royal Blue with Bucky Blue Camo, for example). Be creative,
but make sure it still looks good.
Lesson #4: Mess with fire,
you could get burned.
One
guy in our office wears gloves while crafting. At first, I was weirded out by
it. Now, I question if he’s a genius. If you are using multiple colors on the
same weave, odds are that you are going to have to melt the ends of your
paracord to bring the two separate ropes together. I would also advice melting
the ends of your cord before putting it through your buckle so that you can
pull the cord through more easily. Again, you will use a lighter once your
weave is completed in order to stick the ends to the back of your bracelet.
Basically, you’ll need to use a lighter pretty frequently. And if you mess with
fire, you could get burned.
Keeping
that in mind, I would advise you to be cautious when using your lighter while
crafting with paracord. My fingertips are burned, I’m constantly pulling wax
off of my cuticles, and I’ve yelled “OW!” too loudly in the office on a number
of occasions. Be careful when you are using your lighter. Try to keep the damage
to a minimum.
Lesson #5: Don’t be afraid
to try new things.
My
girlfriend recently told me that I need to try new things. So, I made my first
monkey fist (if you’re reading this, babe, I’m just joking, don’t hate me). On
a more serious note, don’t be afraid to dabble with designs that you haven’t
tried before. As comfortable as the Cobra Knot may be, experiment with
something new. After a while, you may even start coming up with designs of your
own. Paracord crafting is supposed to breed creativity—don’t become too
complacent.
Again,
here I would advise that you use the internet for inspiration. There are all
kinds of places to start looking for new designs—YouTube, Pinterest, Instructables,
etc. If you are looking for something today, connect with us on Facebook,
Twitter, Google+, Pinterest, or Instagram and we can send you a few ideas!
Thanks
for reading, and I hope you found this helpful!
Written by: Jackson Yakowicz
Contact at jacksony@imsetc.com
To read Jack’s full blog,
visit here.
Wednesday, May 27, 2015
Quiz: What Paracord Color Are You?
Find out where your personality lands you on the paracord color chart
We have an astounding amount of color choices here at Paracord Planet. I don't mean to sound cocky when I say that, either--it's just truly mind-boggling how many colors of paracord exist. When I first explored our warehouse, my jaw just about dropped. All of the different shades of blues, the variety of camo combinations, the multi-colored options; I didn't know where to begin! I do believe, however, that one's paracord color choice says a lot about their personality. I wear two paracord bracelets on my wrist at all time. One, made with Bulldog cord because of my love for dogs, and one made with Kelly Green cord because I love money. What? Judge me. Maybe you have a unique story for why you chose the colors on your wrist, too. However, there is no doubt that one's paracord color choice matches (at least slightly) with their personality. Don't believe me? Take the quiz and see for yourself.
How the quiz works: There will be ten questions with five answers each. Answer each question on a piece of paper. Keep track of all of your answers so that you can grade your scores at the end. You will then count up your amount of "A" answers, "B" answers, "C" answers, "D" answers, and "E" answers. Whichever section, A-E, has the greatest amount of answers in it corresponds to your paracord color. Good luck!
1) What does your ideal Saturday consist of?
- A. Going shopping
- B. Going hunting
- C. Just hanging out, I don't know
- D. Going out the club
- E. Taking a hike on the coast
2) What's your favorite television station?
- A. E!
- B. Discovery Channel
- C. The news
- D. MTV
- E. I only really watch Shark Week
3) When do you typically wake up?
- A. Around noon
- B. Shortly after sunrise
- C. Probably around 9 am
- D. No earlier than 3 PM
- E. Crack of dawn, baby!
4) What would be your dream vacation?
- A. A trip to New York Fashion Week
- B. A hunting or fishing trip in northern Minnesota
- C. I don't really want to vacation
- D. A trip to Europe to visit some popular clubs and discos
- E. A trip to Capetown, South Africa
5) What sounds like the perfect date night to you?
- A. A fancy meal at the Four Seasons
- B. A boat cruise around the lake
- C. I don't really like dates
- D. Dancing in the VIP section at the club
- E. A romantic hike in search of a water fall
6) Who would you most like to meet?
- A. Donatella Versace
- B. Bear Grylls
- C. Hmm, that's a tough question
- D. One of the Kardashians
- E. Kelly Slater
7) What's your favorite food?
- A. Caviar
- B. Venison
- C. Frozen Pizza
- D. McDonalds or Taco Bell, after a night on the town
- E. Surf 'n Turf
8) What's your biggest pet peeve?
- A. Scuffing my new shoes
- B. Crowds of people
- C. Noise of any sort
- D. When the DJ stops playing my jam
- E. What's to stress? Life is great
9) What kind of accents, additions, etc. do you like on your paracord bracelet?
- A. Anything shiny
- B. Fishing line and fire-starting buckles
- C. Nothing
- D. Beads!!
- E. A compass would be handy
10) Where did you first learn about paracord?
- A. One of the fashion magazines I'm subscribed to
- B. Bear Grylls
- C. I didn't know about until this blog post
- D. From someone I met at the bar
- E. Somebody left a bracelet on the beach and I found it
Count up your final total of A's answered, B's answered, C's answered, D's answered, and E's answered, and then scroll down to see what this says about how your personality meshes with our paracord colors.
If your highest total was in the A's: Congrats! You are Diamonds cord.
What this means: You have a knack for the glamour and glitz. People are always complimenting you on your fashion sense, and you never leave the house without something shiny on. Diamonds cord is perfect for you.
If your highest total was in the B's: Congrats! You are Multi-Camo cord.
What this means: You love the great outdoors. Whether it's fishing or hunting, winter or summer, it doesn't matter. Your paracord bracelet needs to be functional, survival-ready, and, of course, camouflage. Multi-Camo cord is perfect for you.
If your highest total was in the C's: Congrats! You are Olive Drab cord.
What this means: You are consistent. Some may say 'boring,' perhaps, but you're consistent! You don't need to be around noise, crowds, or anything of the like. You'd prefer to just relax on the couch. And that's fine. Everybody needs some Olive Drab in their life.
If your highest total was in the D's: Congrats! You are Party cord!
What this means: You like to have a good time. Your ideal night is spent out on the town with some friends, and everybody calls you the life of the party! Naturally, you need a paracord color that can match your pizzazz. Party cord is perfect for you.
If your highest total was in the E's: Congrats! You are Tropical cord!
What this means: You probably live by a large body of water. If not, you wish you did! You love hiking, surfing, exploring, and anything else you can do outside or on a coastline. You need a type of paracord like Tropical cord on your wrists.
If none of these answers sounded like you, then don't you worry: your paracord color is still out there. You just may have to discover it for yourself!! Tell us about what color best describes your personality on Facebook, Twitter, Google+, Pinterest, or Instagram. Can't wait to hear from you :) #HappyCording
Written By: Jackson Yakowicz
Contact at jacksony@imsetc.com
To read more of Jack's blog, click here.
Subscribe to:
Posts (Atom)